AUTHORS
CATEGORIES
- Airsoft (2)
- Austin (8)
- Books (9)
- Cooking For Engineers (20)
- Credit Cards (2)
- Current Events (9)
- Deals (4)
- Dining (37)
- Fanpop (4)
- Food (808)
- Games (5)
- Hairy (6)
- Kitchen Gear (7)
- Life (24)
- Miscellaneous (6)
- Movies (15)
- Orthogonal Thought (6)
- Personal Computers (10)
- Photography (158)
- Rant (9)
- Ruby on Rails (2)
- San Francisco (5)
- Soap Making (5)
- Television (11)
- Texas (1)
- Things We Like (11)
- Travel (11)
- Wear or Not (1)
- Web 2.0 (9)
- What I Ate (861)
- Wikipedia (5)
- Windows 10 (3)
- Windows Mobile (1)
- WordPress (1)
ARCHIVE
- September 2018 (1)
- September 2017 (1)
- March 2017 (1)
- September 2016 (2)
- August 2016 (2)
- September 2015 (1)
- November 2014 (1)
- August 2014 (1)
- January 2014 (1)
- September 2013 (1)
- December 2012 (1)
- November 2012 (3)
- September 2012 (1)
- August 2012 (2)
- June 2012 (2)
- February 2012 (1)
- January 2012 (4)
- December 2011 (4)
- October 2011 (2)
- September 2011 (5)
- August 2011 (1)
- July 2011 (2)
- April 2011 (2)
- February 2011 (5)
- January 2011 (12)
- December 2010 (37)
- November 2010 (30)
- October 2010 (25)
- September 2010 (30)
- August 2010 (32)
- July 2010 (34)
- June 2010 (31)
- May 2010 (35)
- April 2010 (35)
- March 2010 (33)
- February 2010 (34)
- January 2010 (33)
- December 2009 (30)
- November 2009 (31)
- October 2009 (30)
- September 2009 (31)
- August 2009 (34)
- July 2009 (34)
- June 2009 (34)
- May 2009 (33)
- April 2009 (32)
- March 2009 (42)
- February 2009 (38)
- January 2009 (57)
- December 2008 (40)
- November 2008 (30)
- October 2008 (33)
- September 2008 (22)
- August 2008 (5)
- July 2008 (5)
- June 2008 (11)
- May 2008 (13)
- April 2008 (10)
- March 2008 (29)
- February 2008 (18)
- January 2008 (28)
- December 2007 (1)
- November 2007 (4)
- October 2007 (5)
- September 2007 (10)
- August 2007 (14)
- July 2007 (10)
- June 2007 (9)
- May 2007 (21)
- April 2007 (21)
Make Soap In The Round With Marble Pattern
Posted 1 June, 2008 at 10:13pm by Tina Jiang(Filed under: Soap Making)
One of the reasons soap making is so much fun is that you get to experiment with various shapes, colors, and scents. These are usually the first things people notice when they are presented with soaps. I think the traditional rectangular bar is quite attractive in its own way, but I also find various other shapes and forms from the simple round or ball to the exquisite specialty mold designs irresistibly charming. There are many different types of soap molds available online and in craft stores, but if you are like me and want a simple and affordable way to add variety and charm to your creations, then you should try soaps in the round.
To make round soaps you'll need the following tools and equipment:
- safety goggles to protect your eyes
- thick rubber gloves to protect your hands and arms from the lye (wear long sleeve shirt, long pants, and socks if possible so none of your skin is exposed in case there’s a splash/spill)
- a good scale for weighing the water, lye, and oils. it should measure down to 0.25 oz, and preferrably have a “tare” function which allows you to reset the reading to 0 after putting a container on the scale, or after you add each ingredient so you have a clean reading of how much of the next ingredient you are adding (I recommend the MyWeigh i5000 digital scale - it’s fast, accurate, and about the same price as the slower readout Salters they sell everywhere. My husband wrote an article on scales a while back: http://www.cookingforengineers.com/article/82/Kitchen-Scales)
- a instant read digital food thermometer to measure the temperatures of the lye water, oils, and the soap mixture
- one 3 quart stainless steel bowl for mixing the oils and lye water
- two heat proof 4 cup/32 oz glass measuring cups (e.g. Pyrex or Anchor brands), one for the lye & water solution, the other for the oils
- ceramic or glass bowl for measuring the lye (plastic tends to be staticky and the lye beads will stick to it)
- plastic or stainless steel spoon for stirring the lye water (wood is not recommended because lye will eat it away over time)
- plastic or silicone spatula for scraping down the soap bowl
- small measuring cup (for measuring glycerin used to mix colorant)
- measuring spoons (for colorant and fragrance oil)
- stick blender (the one I have is the Cuisinart Smart Stick Hand Blender from Bed Bath and Beyond)
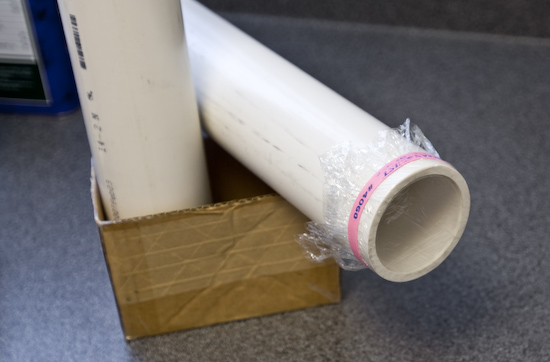
- two PVC pipes: 2 1/2 inch diameter, 15 inches long each
- parchment paper for lining the PVC pipes (the one I have is Reynolds brand, 15 inches wide which is perfect for the length of the PVC pipes)
- saran wrap and rubber bands to seal the bottom of the pipes
- small cardboard box to put the PVC pipes in (or other ways to stablize the pipes)
- knife for cutting the soap after it solidifies
Caution: do NOT use nonstick, aluminum, cast iron, or tin pots/pans, containers, or utensils because they will react badly with lye and ruin both the soap and the tool. Also wood is not recommended for repeated use because over time the wood will eventually break down from coming into prolonged contact with lye.
The recipe I used for this batch of "marbled green apple soap in the round" is the following (yields ~3 lbs of soap):
Note: these are weight, not volume measurements
10 oz distilled water
4.6 oz lye (sodium hydroxide)
18 oz olive oil
8 oz coconut oil
6 oz palm oil
2 tbls/0.9 oz castor oil
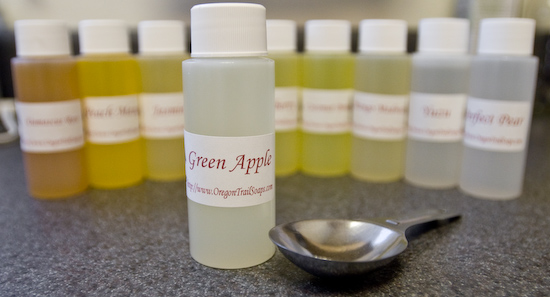
2 tbls green crisp apple fragrance oil (from Oregon Trail Soapers Supply)
0.5 oz glycerin (for mixing green iron oxide colorant)
1/4 tsp green iron oxide (from Oregon Trail Soapers Supply)
Step by step instructions:
1. cover one end of the PVC pipes with saran wrap (fold it a couple of times so there're multiple layers for strength) and rubber bands to seal it
2. put the PVC pipes in a box and check that they are stable and won't tip over
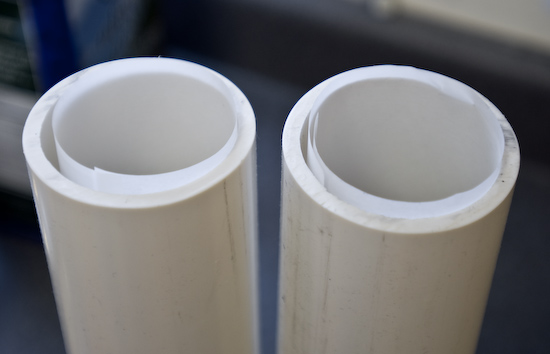
3. line the PVC pipes with parchment paper
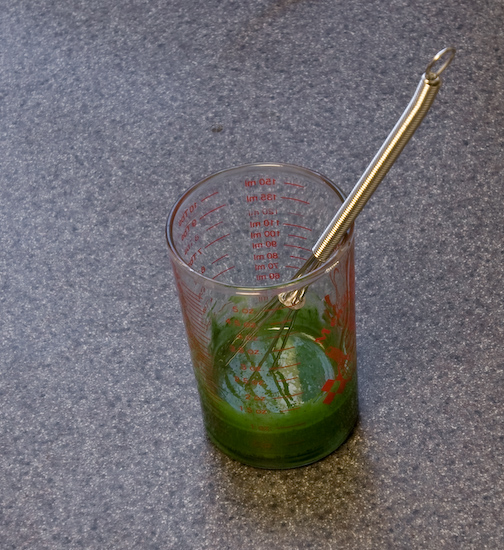
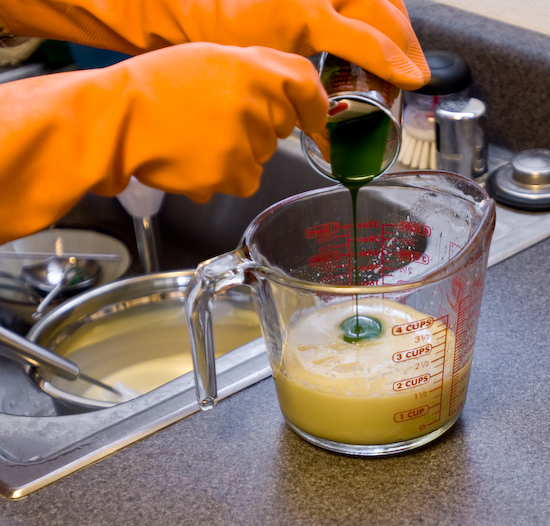
4. pour 0.5oz of glycerin into a small measuring cup, and add 1/4 tsp of green iron oxide powder. mix thoroughly to make sure no clumps of colorant remain. set aside for later use

5. put on your protective gear - goggles and gloves
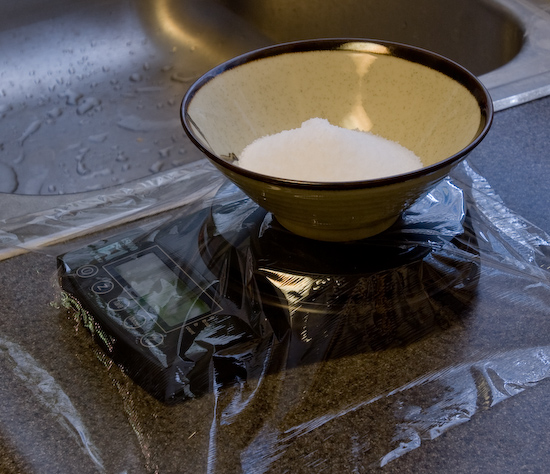
6. weigh the lye - pour 4.6 oz of lye into the bowl
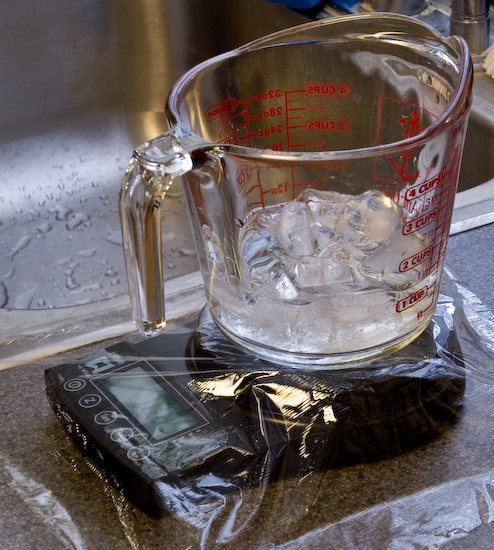
7. weigh the water - pour 10 oz of distilled water into one of the 32 oz glass measuring cups. I used a combination of ice cubes (made with distilled water) and distilled water to: 1) reduce the amount of fumes generated when lye is mixed in, and 2) to reduce the amount of time for the lye water to cool down
8. pour the lye into the water slowly and stir to dissolve - this generates a lot of heat and will normally give off fumes, but not so bad this time since I used some ice cubes (you can also sit the measuring cup in a cold water bath in the sink). Set aside the lye water to cool. Note: never pour water into lye as this will cause a strong reaction and the splash/eruption can incur serious injuries.
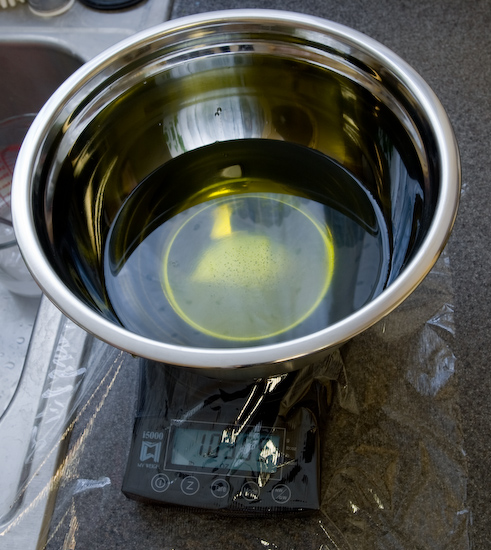
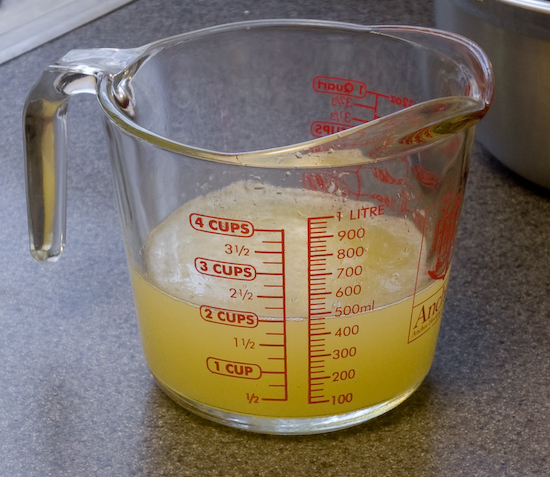
9. weigh the liquid oils - pour 18oz of olive oil and 0.9 oz of castor oil into the stainless steel bowl and set aside - after the solid fats are weighed and melted they'll be added to the liquid oils
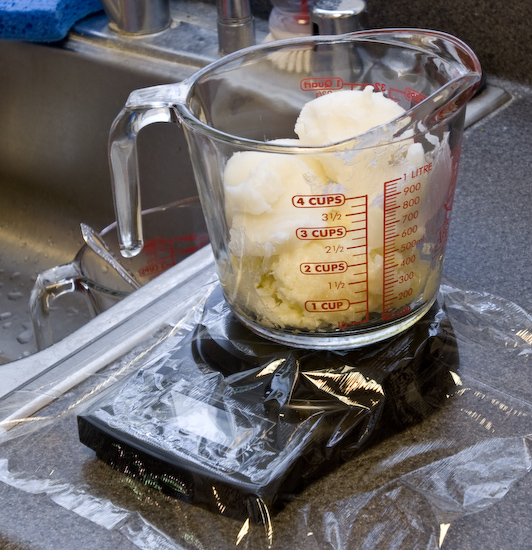
10. weigh the solid fats - scoop out 8 oz of coconut oil and 6 oz of palm oil into the other 32 oz glass measuring cup. Melt the oils in the microwave - start with 1 min, then 30 second increments if needed. Avoid overheating the oils because it will take longer for the oil to cool than the lye water.
11. pour the melted solid fats into the olive oil and castor oil in the stainless steel bowl and mix them together
12. measure the temperature of the lye water and the oils - if they are within 20 degrees (usual range is 90-110 degrees), then it’s ok to proceed. For small batches such as this recipe or one half this size, it's better to work at the higher end of the temperature range. If the oils have cooled down too much, you can warm it up a bit in the microwave - use 30 second increments and avoid overheating.
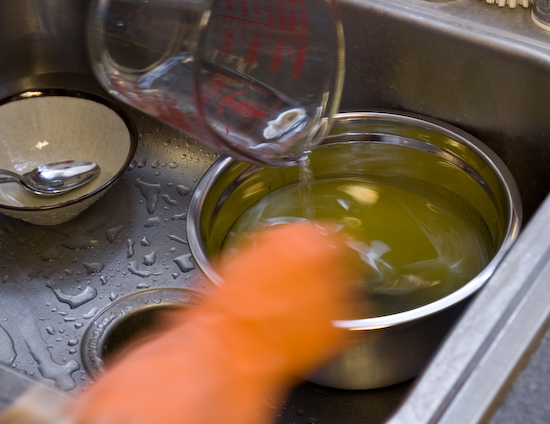
13. pour the lye water slowly and carefully into the oil while stirring. measure temperature of the mixture.
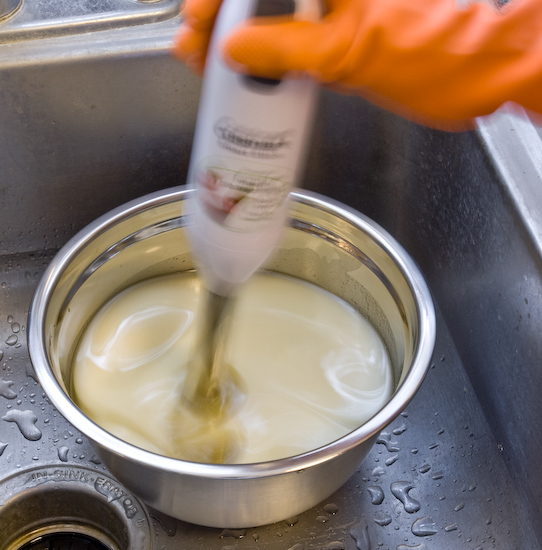
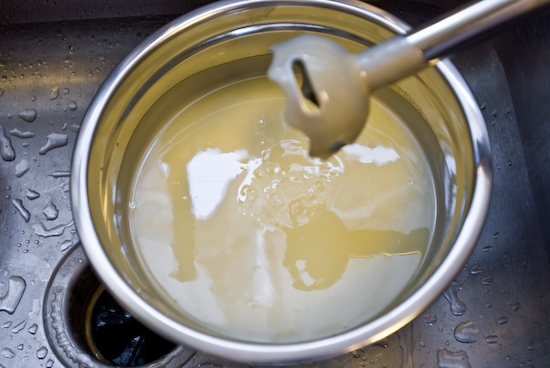
14. use the stick blender to stir the soap mixture until it reaches a thin pudding or gravy like consistency - when you lift the stick blender out of the soap mixture, the drippings should leave patterns on the surface of the mixture instead of disappearing completely. Another way to confirm the soap mixture has “traced” is to check it’s temperature - if it has risen a couple of degrees Fahrenheit, you are there (this is a great tip from the book “Smart Soapmaking” by Anne L. Watson). I usually stop the stick blender every 5-10 seconds to check the consistency. This process may take less than a minute or a few minutes - every batch is a little different so watch the soap mixture closely to gauge the status.
15. add 2 tbls of green crisp apple fragrance oil and mix well. I don't like strong fragrances so 1-2 tbl of FO (depending on the strength of the scent) for every 2 lbs of oils seems to work well for me. Everyone is different so adjust the amount to your liking. Also note that FOs tend to vary in strength depending on the scent, and quality can also vary from vendor to vendor. I recommend buying small quantities (many suppliers offer 1-2 oz bottles so you can sample) and test them before making a large purchase.
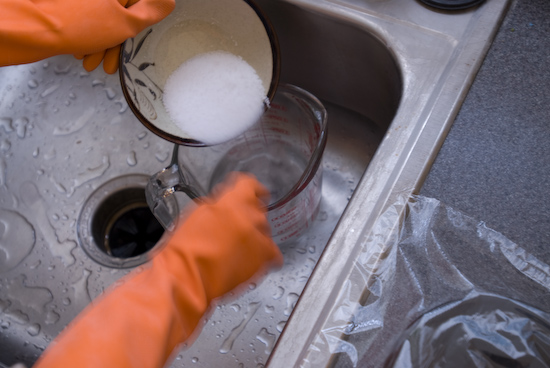
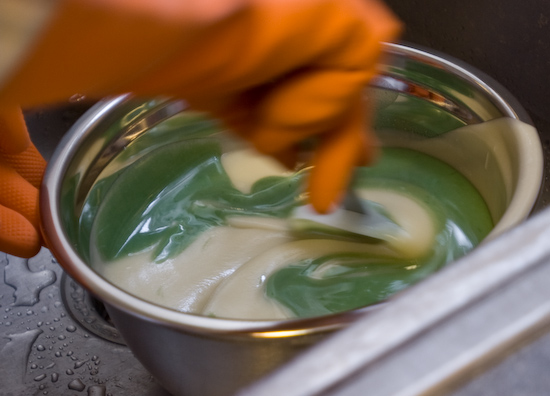
16. since I'm making a marbled soap, I need to color only a portion of the soap mixture then mix it back in with the rest. Pour ~2 cups of the soap mixture into the 32 oz glass measuring cup that was used to melt the solid fats, add the green iron oxide and glycerin mixture, and mix well.
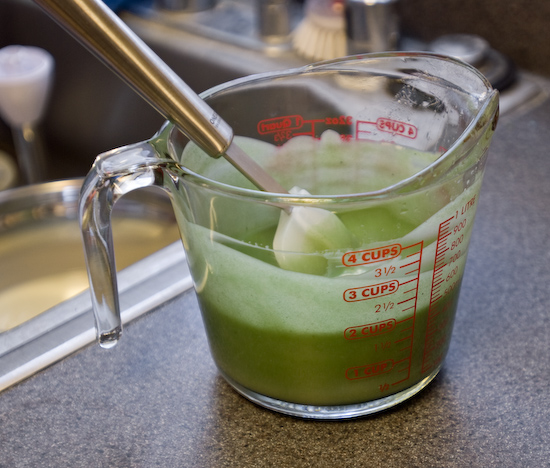
17. pour the green colored soap mixture back into the stainless steel bowl and gently stir a bit (avoid over mixing)
18. pour the soap mixture into the PVC pipes lined with parchment paper - try to split somewhat evenly between the two pipes (it's ok to have extra space at the top). leave it undisturbed for a day or two. during the first few hours after pouring, the PVC pipes are warm due to the heat generated by the saponification process.

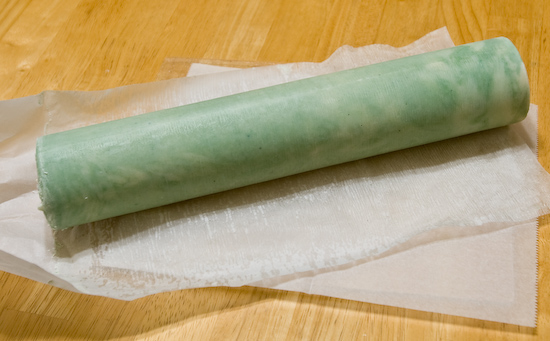
19. a day or two later, after the soap mixture has solidified and cooled down, remove it from the PVC pipes - with your gloves and goggle on, remove the saran wrap and rubber band from the bottom of the tubes, then grab the extra parchment paper from the top end and pull the soap out of the pipes. Peel off the parchment paper and let sit for another day if the soap is too soft to cut.
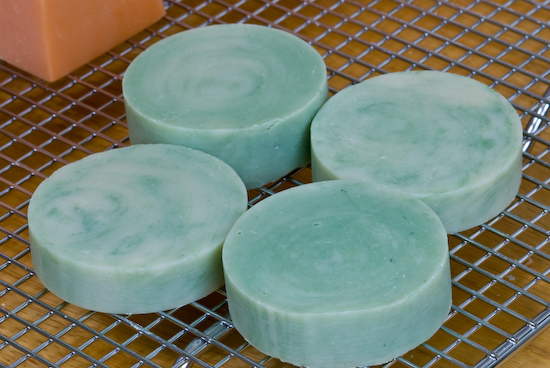
20. when the soap feels firm enough to cut without flattening the bottom or sticking too much to the knife, (with your gloves and goggle on) cut into disks and dry on a rack in a well ventilated area for 3-4 weeks, turning on their sides every other day or so to ensure even drying. During this time the saponification process completes and the soap becomes milder with time, as well as harder and longer lasting with the evaporation of water. (I think I did over mix the soap, since the marbling pattern is not as pronounced as I was hoping for, or perhaps the action of pouring the soap mixture into the pipes contributed to the over mixing.)
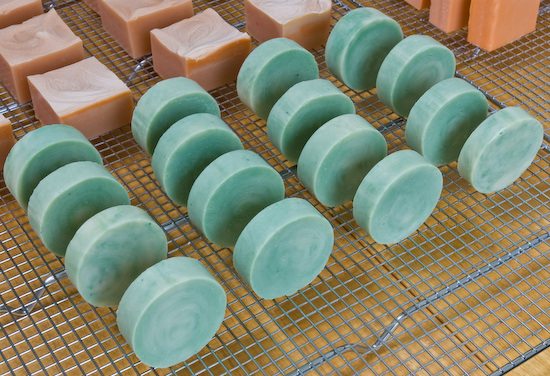
After 3 weeks, enjoy the beautiful and deliciously scented green apple soap rounds! Friends and family will surely appreciate this wholesome gift :).
Since there are no preservatives in these soaps, they'll eventually go bad. Store them in a cool and dry place away from direct sunlight, and use within a year or so (six months in hot and humid areas).
To clean up after making soap, with your goggles and gloves on (because the soap mixture is not yet neutral), wipe everything down with towels/paper towel then wash with dishwashing liquid and warm water.
Happy soaping!
p.s. here's my first blog post about how to make a basic bar of natural soap at home:
http://www.orthogonalthought.com/blog/index.php/2008/05/homemade-natural-soap-basic-recipe/
and a third article on making soaps in a slow cooker (the soap is usable right away): http://www.orthogonalthought.com/blog/index.php/2008/06/handmade-soap-using-a-slow-cooker-hot-process/
and a FAQ article with the most commonly asked questions about soap making and my answers:
http://www.orthogonalthought.com/blog/index.php/2012/08/make-natural-soap-at-home-faqs/
42 comments to Make Soap In The Round With Marble Pattern
Michael Chu, June 2nd, 2008 at 7:42 pm:
-
Great job!
Here's a link to the first soap article - how to make a basic bar at home.
mypraise, June 3rd, 2008 at 10:03 pm:
-
Wah, how clever! I personally like the round shape of soap very much, but it bothers me a bid was that I always thought about making round shape of soap are wasting too much soup and takeing a lot of time by cutting off the corners and shape each of them to a nice circle. Wah, your way is not just simple and affordable, it also didn't wasting any bid of soap and take no time. Good job!:)
Amy, June 4th, 2008 at 4:45 am:
-
Lovely tutorial. Do you leave the soap there for a couple of days so it is easier to remove from the pipe?
Tina Jiang, June 4th, 2008 at 11:27 am:
-
Amy, the soap solidifies and saponifies while in the mold, although full saponification takes longer, which is the reason for curing the soap for a few more weeks. Depending on the recipe and the size of the recipe, it may take more or less than a couple of days for the soap mixture to solidify and cool down. For this particular recipe one day is usually enough. I'd say as long as it's solid and cool, you can take it out.
eh, June 4th, 2008 at 9:57 pm:
-
is it weird that i want to eat them?
Tina Jiang, June 4th, 2008 at 10:17 pm:
-
No, not at all! One of my coworkers said they look like candy :-D. There are definitely times when I have to summon all the strength within me to not take a bite out of the soap, for example the almond meal ones I made recently with hot process and a silicone muffin pan as mold - they look and smell so tasty! Very hard to resist…
michelle, June 5th, 2008 at 7:01 am:
-
dear Tina
I might be jumping ahead a little bit but is there away to make clear soap? Can you also use crayons as the colorant instead of the iron oxide? If so how much would you use and would it change anything with the soap like setting time or mixing?
ty
Michelle
Tina Jiang, June 5th, 2008 at 8:21 am:
-
Michelle, making clear soap requires the use of alcohol and cooking the soap - I have not tried this yet due to the difficulty of obtaining 190 proof alcohol here in CA, but plan to try making it with 80 proof vodka sometime in the future (it may take me a while). In the mean time, check out Catherine Failor's "Making Transparent Soap" book and also this web page: http://millersoap.com/glycerinsoap.html
You can use crayons as the colorant - I've tried one piece for every 2-3 lbs of fat and the color turned out nicely. Note however, not every crayon color will come through as mentioned on Miller's soap page: http://millersoap.com/soapdesign.html#Color. The orange colors seem to work well, red turned into a nice pink, and green turned into yellow - what you see is not what you get a lot of the times, but all look nice to me so I'm ok with it :). An easy way to use crayon is to melt it first with 1oz of oil at the beginning of the soap making process, then add the rest of the oils before combining with lye water. This will give you an even color throughout the soap. I haven't noticed a change in trace time with crayons. It's a fairly easy and very economical way to color the soaps :).
Lynn F, June 6th, 2008 at 5:06 am:
-
Miss Jiang
We are giving my grandfather a 60th birthday (surprise) celebration in Decemeber and I am in charge of token gifts for the female attendees (about 50). I am 19 years old and want to try soap-making (my specialty is crocheting). I love the concept of making a marble round soap. I would like to make a Shea Butter soap with a light magnolia scent. How could I incorporate this into this tutorial. I have enough time for trial and error

Tina Jiang, June 7th, 2008 at 11:02 pm:
-
Lynn, great idea - I'm sure your guests will appreciate this thoughtful gift very much :). A couple of our friends just got married on Friday and I made them a gift basket stuffed with handmade soaps, bath salts, oil, scrub, splash, lotion, etc.. It's a wonderful feeling to give others something I made with my own hands with love and care :).
To answer your question: shea butter is generally added to the recipe at 5-10% of the total weight of the oils, although I've seen as high as 20% in some cases. Make a few batches with varying amounts of shea butter, use them and compare notes to determine what you like best. If you start with the recipe in the above post, you can reduce the amount of olive oil and replace with shea butter, e.g. use 16oz of olive oil and 2oz of shea butter (~6% of total oils) in addition to the coconut, palm, and castor oils, or use 14oz of olive oil and 4oz of shea butter (~12% of total oils), or 12oz of olive oil and 6oz of shea butter (~18% of total oils). Melt the shea butter along with the coconut oil and palm oil then add the melted fats to the olive oil.
The amount of lye needed will change, and I recommend that you use the Majestic Mountain Sage online lye calculator to get the exact amount of lye needed for each recipe: http://thesage.com/calcs/lyecalc2.php
Since you are new to soap making, it's best that you try making the soap without colorant and fragrance first to become familiar with the basic process. Once you are comfortable with making a plain bar, it'll be easier to deal with the additional steps of mixing colorant and fragrance oil. It’s very helpful to keep a journal of every batch you make. I take notes on things like when it was made, batch size, ingredients (description and amounts, including colorant, fragrance, and other additives), temperature of lye water & oil, mold used, when soap was taken out of the mold and cut, moisture level and firmness, # of days of drying, and any other relevant details I notice during the process. The journal has been very helpful in figuring out what worked and what didn't, what to do differently next time, and trouble shooting, etc.
Good luck in your experimenting and have fun :)! Let me know if you have any other questions.
Jen, June 17th, 2008 at 6:57 pm:
-
hey Tina, can you suggest a fairly basic recipe that results in a firmer bar (firmer than the soap from your first soap post) ?
Tina Jiang, June 18th, 2008 at 8:43 am:
-
Jen, to make a harder bar you can substitute a portion (try 4 oz) of the olive oil with another oil that's solid at room temperature, e.g. palm oil, palm kernel oil, cocoa butter, lard, or tallow (beef fat), depending on what you can get easily. I don't recommend increasing the amount of coconut oil since it's already 36% of the original recipe and too much of it can be drying to the skin. Please use the Majestic Mountain Sage online lye calculator (http://thesage.com/calcs/lyecalc2.php) to get the exact amount of lye needed for each recipe you make. Hope this helps!
Marcy, June 21st, 2008 at 7:24 am:
-
I love this idea! Just one quetion. If I'm using a 2 1/2 inch PVC pipe how thick should I cut the soap bars to get 4oz size soap?
Thank you
Tina Jiang, June 21st, 2008 at 9:39 am:
-
Marcy, try cutting a piece with 1.5 inches of thickness and weigh it, then adjust accordingly. Note that as it cures there'll be water loss and it'll weigh less in a few weeks than when you first cut it. The rounds I have were made 40 days ago, and two piece together measure ~1.5 inches in thickness and weigh ~3.85 oz total. Hope this helps.
michelle, June 21st, 2008 at 10:32 am:
-
Tina
things are coming along great with our newly curred soap but I do have a wonderment. Why distiled water? Im not sure if you went over that in your first blog or not. I was also wondering would flavored water do anything to a batch or would beer or another liquid work?
Tina Jiang, June 22nd, 2008 at 10:30 pm:
-
Michelle, I'm so glad to hear that your soaps have turned out well :). Distilled water is usually recommended because it's as "pure" as you can get, compared to for example tap water which usually contains chlorine. I don't have much experience with other liquids, but here's an article written by David Fisher about making soaps with tea, coffee, wine, beer, etc.: http://candleandsoap.about.com/od/beyondbasics/a/lyealternative.htm. In the article there's also a link to making soaps with milk. I've made a couple of batches of milk soaps, one with cow milk and one with coconut milk - both turned out nicely and I like the creamy bubbles :).
Karen, September 3rd, 2008 at 4:51 am:
-
Hello,
I love reading your recipes for soap…Do you have any for goat milk and coconut milk soap?…Could I substitute Virgin Coconut Oil for any oils in the soap?
Tina Jiang, September 9th, 2008 at 9:13 pm:
-
Thanks, Karen :). To make milk soaps you can substitute water with milk or add powdered milk to the soap mixture. I don't have a lot of experiences making milk soaps, but here are some helpful articles written by David Fisher on this subject:
http://candleandsoap.about.com/od/beyondbasics/a/lyemilk.htm
http://candleandsoap.about.com/od/tipstricks/ss/goatsmilksoap.htm
http://candleandsoap.about.com/od/soaprecipes/ss/coconutmilksoap.htmYou can substitute other oils with coconut oil, but from what I read too much coconut oil can be drying to the skin so normally it's kept below 30% of the total oils. Although I've seen 100% coconut oil soaps sold in stores. Feel free to experiment and figure out what works best for you! I recommend the Majestic Mountain Sage online lye calculator for figuring out the right amount of lye for your specific recipe: http://the-sage.com/calcs/lyecalc2.php
Good luck and happy soaping!
Bracken, November 14th, 2008 at 7:53 am:
-
Hi I just found your blog. I put my website details in but it is not yet up and running. I am in the UK. Just started up on business making cold pressed soaps ( have been making them for awhile now altho I use a mix of Greek olive oil, coconut oil and organic palm oil for my basic mix ( with additional enrichments and essential oils). I had to let you know tho how wonderful this soaps in the round idea is. I have to have a go at that. All my current soaps are made like your first post in a mould and then cut to 100g bars. I am so excited I want make some soap in the round right now. ( unfortunately not at home so it will have to wait! Thank you so much for sharing this brilliant idea. I shall book mark your blog so I can come back and see what other great ideas you have.
Bracken, November 21st, 2008 at 1:50 am:
-
I cant spell either!
Tina Jiang, November 25th, 2008 at 5:58 pm:
-
Bracken, I'm very happy to hear that my blog post was of help to you. Speaking of round soaps - the Sappo Hill company in Oregon makes all their soaps in the round, and they have a few pictures of their production facility on their website: http://www.sappohill.com Perhaps this will give you some ideas on producing round soaps on a larger scale. Good luck and wish you all the success with your soap business!
Sue, January 26th, 2009 at 6:23 pm:
-
Hi Tina, I have a question that is about making liquid soap. I have seen several recipes that call for potassium hydroxide. When I attempted to purchase it, I found out the 6.5% was heavy metals, lead, mercury and nickel. Do you know if there is a pure form of potassium hydroxide or if there is some other way to make liquid soap? Thanks, Sue
Tina Jiang, January 26th, 2009 at 7:34 pm:
-
Hi Sue, you can buy pure potassium hydroxide online from soapmaking supply websites. I purchased mine (2lb container) from http://www.snowdriftfarm.com. You can also do a Google search for "potassium hydroxide" and find other sellers such as http://www.sciencecompany.com and http://www.CamdenGrey.com.
Fiona, February 11th, 2009 at 11:57 am:
-
This is a stupid question, but how can you tell when the soap has gone bad and shouldn't be used? I bought some handmade lavender soap that now has white kinda moldy-looking stuff on the bottom (it was stored for 4 months in a drawer in my clothes closet). Is this harmless? Or should I throw the soap away?
Tina Jiang, February 12th, 2009 at 7:03 pm:
-
Fiona, what I mean by soaps gone bad is that they become rancid/stale over time. Brown spots develop on the surface and eventually the whole things smells like rancid oil. I've used stale soap on my hands before and it washed fine like fresh soap. Not sure if it's harmful or if it's just unpleasant smelling. I don't really know if your lavender soap is ok - does it smell bad? If not it's probably ok.
Fiona, February 13th, 2009 at 1:08 pm:
-
The soap smells fine to me, so perhaps it's just the essential oils separating or something like that. Thanks for the feedback, Tina!
Jodi, October 30th, 2009 at 2:58 am:
-
What an interesting hobby and thank you for sharing, Tina! I loved the interaction between you and the other commenters also. I'm tempted to try soap-making one day. Have you ever considered teaching a class?
jackie, December 14th, 2009 at 5:51 pm:
-
Thanks so much for the great information. Easy to follow. Do you have a website available for teaching. I am a newbie to soapmaking. Using the everything soap making book, I use this recipe as my only one and change it up with differen't scents, etc. However I still have alot of learning to do and just loved your teaching. Thanks so much. Please come out with some more posts that we all can learn from. Sincerely jackie
Michelle, March 1st, 2010 at 3:35 pm:
-
Hi Tina,
Just found your blog searching for soap in the round. I have been making soap for several years, and I am just now getting the courage to try to sell it. It has been a few years since I made round soap. I messed up and just poured the soap into the PVC pipe, and it won't come out!!! I believe I can freeze it, and then soak it in water so it will shrink a bit, but the paper would have been much easier. Glad I found your blog. Everyone seems so nice and helpful.
Michelle
Wilmington, NC
Wayve, March 29th, 2010 at 7:29 pm:
-
Hi there
I am wanting to make soap with natural flowers eg: flower peddles like lavender, gradula and what ever else flower i can use. Have you made soap with these and do you have any info or does the book you learnt from have that information in it. By the way your work is great and seems very easy to follow.
Thanks heaps and will be waiting on your reply
Wayve
Maria, May 14th, 2010 at 3:33 am:
-
Hello, I recently made shampoo bars and it after pouring in mold and covering it for 24hrs, it never got hard…I don't know what went wrong…my question is how can I get rid of it? I don't want to rebatch since this was my first try at making soap. Where can I get rid of it?
thaks!
Karen, August 29th, 2010 at 6:24 pm:
-
Tina,
I love your blogs! You make everything easy to understand. I had a few questions of my own. Im looking to make Oatmeal with a lavender sent. How would I go about it and in what step would I add the Oatmeal to the recipe with marble pattern?
Thanks in advance!Karen
Jinny, September 23rd, 2010 at 3:27 pm:
-
Do you have a separate set of measuring cups and other tools dedicated to soup making specifically or do you just clean everything really well?
Jinny Kwan, September 27th, 2010 at 9:15 am:
-
soap*
Michael Chu, September 28th, 2010 at 4:25 am:
-
Tina keeps a separate set of measuring cups and tools for convenience.
Eduardo, October 20th, 2010 at 3:38 am:
-
Hi!
I love your blog! I'm thinking to start making my one soap and I have a doubt. Can I use the melt & pour soap with soap made by me with the method cold process (using lye)?Thank's
Eduardo
Donna, February 26th, 2011 at 9:26 pm:
-
I have posted a great recipe for goat milk soap and my customers love it. I just had one lady come to my home to purchase 4 bars of it. A great gift idea is to put your soap in an organza or tule draw string bag. You don't even have to take the soap out of the bag,it can be used as a bath puff. I tell my customers to hang it by one of the draw strings in the shower to keep it dry when not in use. The soap lasts longer that way.
katie, July 28th, 2011 at 10:43 pm:
-
I just loved your clear easy to follow recipies, just starting this venture. I am a holistic therapist and make up gift bags with aromotherapy oils individually mixed to suit client. These bags have proved extremely popular as gifts or just for clients own use. The next move seemed to be natural soaps, balms and creams to compliment the oils as I can use my aromatics (no chemicals) to enhance the whole experience. Can I be really cheeky and ask approx how much it is to make a batch, or how much you sell for, before I embark on the whole experience I need to get sensible costings and this is always difficult. I could go to websites but you seem honest and willing to share and if I can help in anyway by supplying anything you need (would even send you a free gift bag to try) then please let me know. We need to spread the word that natural is good, in a fast paced chemical age how wonderful to get back to nature. I have sourced some lovely dried flowers for adding to soaps, sunflower and chamomile at the moment. They look just perfect for what I want so fingers crossed, if you want details contact me and I will forward suppliers details they were so so helpful.
Keep up the good work, so glad I found your site.Brightest Blessings
Katie
kmholistictherapy@btinternet.comanyone free to contact me for info on my services which includes distant healing with Reiki. As I live in the Highlands I don't expect anyone will be contacting me for hands on healing!!!!
Good luck everyone out there.
kt:)
Mom@home, March 29th, 2012 at 5:39 am:
-
Hi Tina,
I live in India where it is really hot and humid - between 90F to 105F
I am so tired of all the chemicals in the soaps here and there being no 'organic or natural' soaps avlb…..I wanted to learn about soap making at home and came across ur website. All the oils you have mentioned are in a liquid form here - coconut esp. So - my question is once I measure and mix all the oils in their liquid form …
1. do I heat them together to about 100F? to mix with the lye solution
2. will the soap solidify after trace given the warm climate?
Thanks for a fabulous detailed website!
Linda, July 29th, 2012 at 2:08 pm:
-
Tina, I have a question about stored goat milk soap. Had a large quantity of "smaller" sized, "odd" shaped (mostly rolled into balls) bars of goat milk soap donated to our ministry for distributing to people in need of toiletries. Still have a plastic bag full left. It has been probably 3+ years since they were donated. Are they still usable? How would I know if they were not good any longer? Is there a test I can do? What would/could happen if they were used after that long a period. Confused as I see articles saying the soap is good indefinitely and others saying 6 months to 1 year???
Thanks for your input,
Linda
Anonymous, July 29th, 2012 at 5:43 pm:
-
Soaps can still be usable even after they've been stored for a while. They may develop orange/brown spots or smell bad due to the oils gone rancid, but they can still work for washing hands, etc.. Inspect your goat milk soaps to see if they look or smell bad, if not, it's probably ok to use. If stored in a cool, dry place, some soaps (that don't contain ingredients that spoil quickly) can last for a long time.
Jonathan & Kaycie Cook, December 28th, 2012 at 3:44 pm:
-
Thank you for this article. We have tried and tried to get our soap out of the PVC pipe. So, does the addition of parchment paper work that great!
Jonathan & Kaycie of The Sudsy Soapery